Sunday, November 13, 2011

The Boys Room

This past weekend we finally got to the boys room. Don't worry I didn't forget about my daughters room. Pictures will be up soon. She just has a couple of last min things to put up. The boys were so happy to have a room again. They have been with out a room for a week and were looking forward to having a place to call their own. Their room was much easier to put together because they had all the same things. We bought nothing to make it happen. All we did was change the paint color. Here it is:


This is not the best picture. The room is so small I couldn't get a better picture then this. The boys chose to paint their room blue. Of course:). We found this Pottery Barn boat bed on Craigslist a year ago for about 1/4th the price. I sold are entertainment center that was just to big for are home and bought the bed for the boys. I have done that a lot. Sold something on Craigslist that was just not practical and buy something more practical with that money. Craigslist in Maui is a must! As you can see I took the trundle part of the bed and put it diagonal. Then every night we don't have to keep taking it out. It can get a pain believe me. Also my youngest son feels special because he has his own bed. I put baskets in the open space.  The bed spreads I got on clearance one year for an amazing price. They are the Island Surf collection from PBkids.

This is the book shelf I made years back. I love the one that PBkids sells but just could not afford it at the time. So I made one. I had scrap wood laying around from an old bed. I used 5 pieces and cut them to the length I wanted. I layed it the way I wanted it to look making sure books could fit on each shelf..ect. I used a two inch drill bit and drilled three holes in the side of two of the pieces of wood  at the same measurements. Then I screwed the other three pieces to those two pieces, those being on either side. I spray painted it blue and  I attached it to the wall using long wood screws. I had bamboo on hand and put those threw the holes I drilled. That was it. I put the books in and it was all done! I was so happy with the way it turned out. You could always attach beadboard to the back too. That would look cute! My youngest son wanted it by his bed in this room. He was SO happy. When he came in and saw it the first thing he did was lay down and he grabbed a book:) This project pretty much cost nothing. I had everything on hand. Now that is one happy mom!


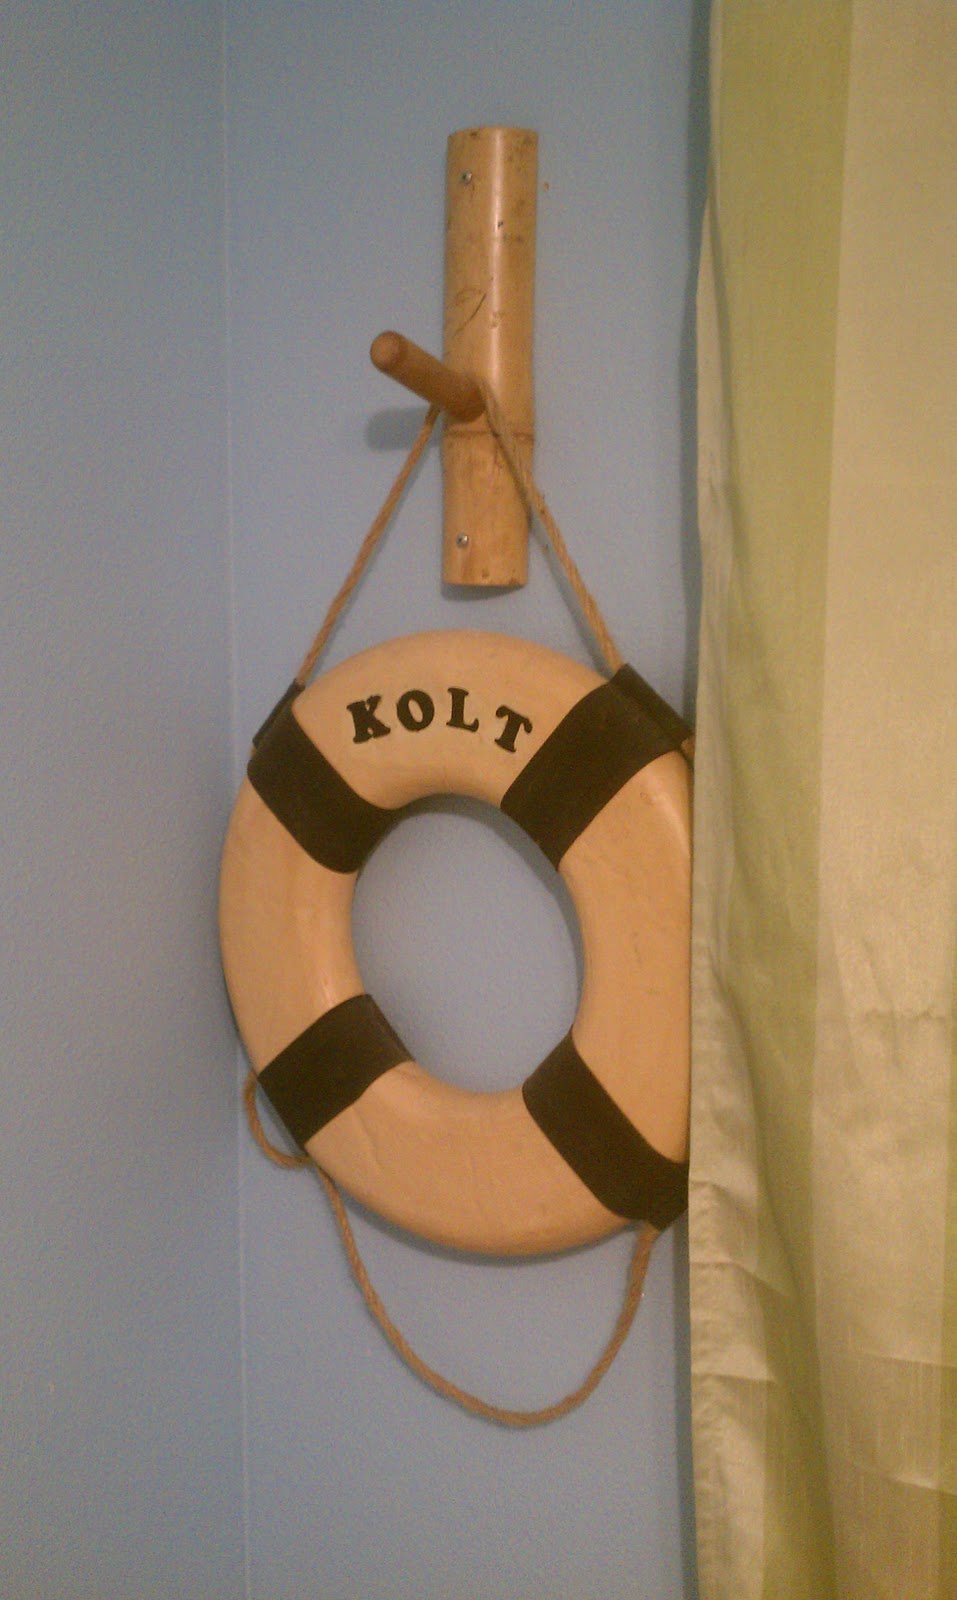
Now these are my favoriate things in their room. I found these life perserves at are local discount store for $3. I bought transfer lettering for $3 and put the boys names on them. The bamboo hooks I orginally bought for my husbands surf boards years back at a local bamboo dealer but they didn't work. So instead I used them for the boys rooms. I belive they were $10 each. Pricey but well worth it. I love the look.

All in all the boys were so excited to sleep in their new room last night. They had more space to play today which made it all well worth changing rooms:)

Pancakes and Corn Husks

I made yummy pumpkin pancakes this morning. My youngest son ate 7 of them! I guess they were good. They were just the right mix of everything and I think they turned out pretty yummy. I left out the ginger and the cloves though cause I didn't have them on hand. This is the Martha Stewart recipe I used:

1 1/4 cups flour
2 tablespoons sugar;
2 teaspoons baking powder;
1/2 teaspoon each cinnamon, ground ginger, and salt;
1/8 teaspoon nutmeg; and a pinch of ground cloves.
1 cup milk,
6 tablespoons canned pumpkin puree,
2 tablespoons melted butter
1 egg

Whisk together flour, sugar, baking powder, cinnamon, ground ginger and salt. In a separate bowl blend milk,pumpkin puree, butter and egg. Fold mixture into dry ingredients. Melt some butter in a skillet over medium heat; pour in 1/4 cup batter for each pancake. Cook pancakes about 3 minutes per side; serve with butter and syrup. Makes 8 to 10.

I found the prettiest fall wreath made out of corn husks online a couple months back. Me and my friend fell in love and  we wanted to have a wreath party and make them but it just hasn't happened so I decided to make one this week. Here it is what you need: A hay wreath and a pack of corn husks. I got the wreath at a thrift stores for a $1. Its a small but it was only a buck so who cares:) I got the corn husk at a local grocery store for $3. No tamale making here just wreath making:).


I cut the corn husks in half length wise and soaked them for about 5 mins. This step makes it much easier to deal with. Then I got started pinning them to the wreath. The tutorial I found said fold in half and pin. So that is what I did. I did not have flower pins so I just used sewing pins:) Probably didn't work as well as the others but it did its job. Fold in half pin and then fold another and lap over the existing one till you go all around the wreath. You could also do a couple rows of corn husk then pin and overlap. I just did one cause it was such a small wreath but looking back now I wish I would have done a couple rows of smaller pieces pin then overlap. Next year:).


Here is how it turned out. I thought mine looked a little plain compared to the tutorial I followed so I put my own twist with adding some berries and hanging it from a piece of twisted burlap fabric.


I know it will only be up for a couple weeks but hey who cares right?? It was fun making it and I can save it for next year.